Tuesday, March 22, 2011

Williamsburg

Good news! I'm going to start linking some products in the posts,mostly in the Materials list to help you get the things you need to make the projects. If I'm not able to find it online ill leave you a note at the bottom of the post. Hope you enjoy the new feature.

I actually had a lot of fun in Williamsburg this week, the energy and vibe in this hood was awesome. The counter-culture independent thinking translated into the clothes seen through out the streets. The Eco-friendly artisan style was extremely approachable. You've gotta love the new urban bohemian, the "hipster"!


This weeks how to: Chain Headpiece

Materials
chain
charm
jumpring gold/ silver
endcap gold/silver

Step1: Cut 2 pieces of chain. One to go on top of ur head from front to back, the other to hang on the sides. Cut to desired length using the flat nose pliers.


Step2: Take your center chain and put the end caps on and squeeze them with the flat part of the pliers to secure them.


Step3: Fold the other piece in half and connect the center point to one end cap using the jumprings.


Step4: Connect the 3 loose ends and the charm using a jumpring

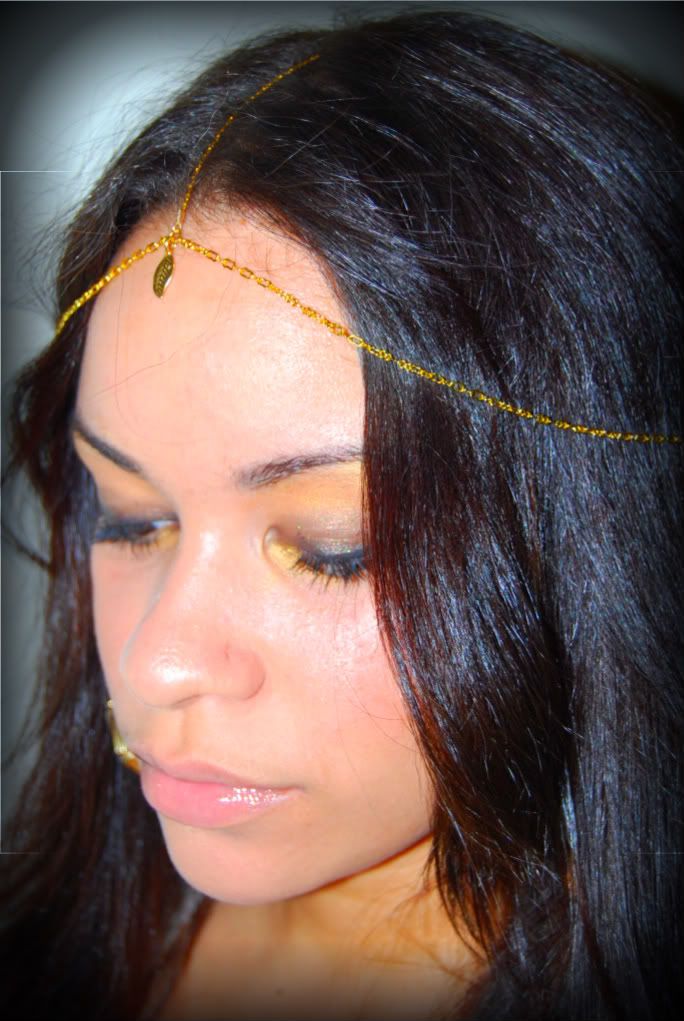
Note: I bought my chain and charm at my local craft store. You can play around with different types of chains and pendents to make it your own.

Tuesday, March 15, 2011

Harlem

So I hit the streets of Harlem in the pouring rain for the love of style. While most use the rain as an excuse to slap on their sweats with a pair of boots some just cant help being awesome. There weren't really any recurring trends from what I saw besides an umbrella but the look was very urban and diverse.


Dakota & Devani from Icicle Dust, click on their pic to go to their site. I love their video

This weeks how-to: Spring Bag
Materials
Cardboard box
fabric
fabric glue
scissors
chain
Clothes/bobby pins(optional)
decorations(optional)


Step1: Cut the flaps off of your cardboard box top

Step2: Place your box on your fabric, cut a piece to cover the bottom and one to cover all 4 sides of the box leaving an inch or 2 for the top. You should end up with 2 pieces.

Step3: Glue the bottom, cut off any excess. Now glue your big piece to the sides aligning it with the bottom.


Step4: Cut the fabric at the corner. Add glue to the top inside of the box and fold over. You can add clothes or bobby pins to make sure it stays put until the glue dries


Step 5: Make a puncture hole and pull your chain through


Step6: Decorate and go out rockin' your new spring bag sweet thang


Wednesday, March 2, 2011

Uptown Baby

So this weeks post took me up north to Manhattans Washington Heights. I probably should have gone on a day other than Sunday since everyone looked like they were getting over their hangovers and just threw on whatever they could find. But never fear, no matter what some people refuse to leave the house in anything less than snaztastic and thus I was able to find style in the heights.


This Weeks how-to: T-shirt Skirt
Materials
T-shirt
Scissors
safetypin

Step 1: Lay your t-shirt flat and cut about 1 inch below the sleeve straight across. Cut the remaining inch into a long strip. Toss the arms and neckhole. Now you should have 2 pieces.

Step 2: Cut a small slit into the hem

Step 3: Take your safety pin and attach it to one end of your strip and pull it threw the inside of your hem
Step 4: Turn it right side up, tie it and viola! A new skirt, Go on with ya bad self.