Sunday, March 3, 2013

DIY Leather Clutch

Recently while I was going through the March issue of Vogue magazine I noticed this cute leather Celine Clutch and I was inspired to make this simple DIY for you guys.

DIY Leather Clutch

Materials
Leather
Fabric
Cereal Box
Marker
Scissors
Glue 
Bobby Pins

Step 1
Trace cereal box twice


Step 2
Draw two tabs on the bottom rectangle about an inch. I didn't measure them I just eyeballed it. They dont need to be perfect they wont be showing. Now draw a flap on top ( I decided to eliminate it in my final clutch but if you want yours to serve as a flap then make sure its an inch or two wider than mine)

Step 3
Draw tabs on your top flap


Step 4
Cut it out

Step 5
Cut out the front and back. Glue fabric to one side of cardboard. Glue cardboard to bottom part of the clutch


Step 6
Glue flaps for top and bottom, hold it down with bobby pins until the glue settles


Step 7
Glue Side tabs by placing the glue at the edge of the inside lining. Fold in the tabs and fold bottom of clutch over. Make sure everything is aligned and lay something heavy on it for about 20 minutes or so. I set my Vogue on it. With all those ads it was heavy enough.

Step 8
Slide the other piece of cardboard inside. Now you can tuck in your top flap or not its up to you.


Enjoy Errrrbody!

Tuesday, January 8, 2013

Lavoz For Qu3st

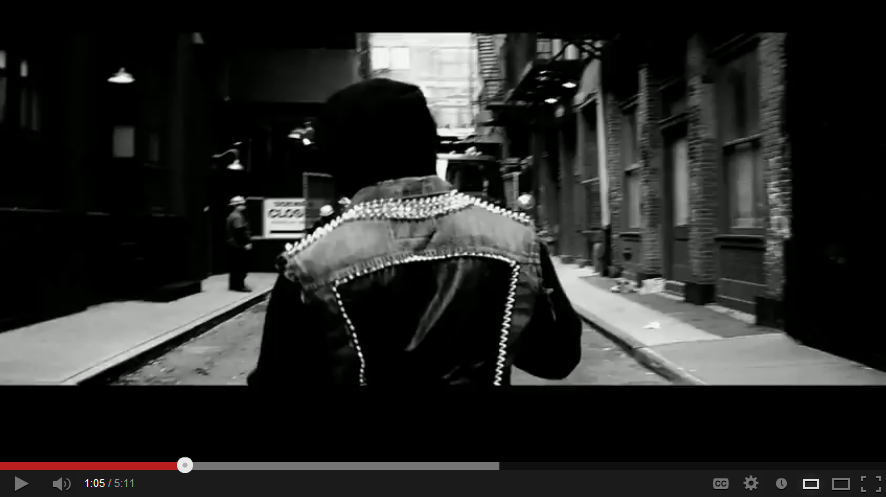
I recently made a vest for Qu3sts new music video Revolutionary Affiliates.


Go check out the full video!!!! Oh yea and Im in it too!! Woop woop!

Qu3st- Revolutionary Affiliates

Hope you enjoy!

Tutu Dress Made for a Princess

My daughter who Ive mentioned in previous posts turned two last week! I ended up making her this cute little tutu dress, it was super easy only took about 45 minutes. I took a look at a couple of youtube posts before I got started. I've posted the links to the ones I found most helpful at the bottom. Best part?!?! It Cost me less than 10 dollars!


Tutorial 1 by Tuttie Cutie Tutus

Tutorial 2 Part 1 Part 2 Part 3 Part 4 Part 5

Monday, July 2, 2012

Dipped Shorts

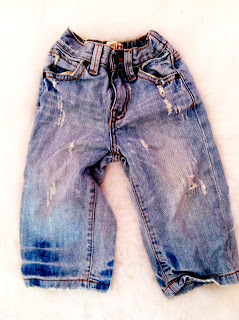
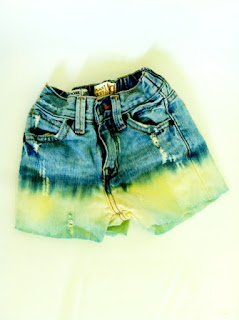
I've been on a constant search for months for cute, affordable not-so-kiddy shorts for my 1 yr old. I was able to find a thing or two from the childrens section in H&M but for the most part it was a huge fail. Then a little light bulb went off and here we are. I took a pair of my 2 year old sons old jeans that didnt fit him anymore and made it into shorts for my daughter. This is a simple DIY that im sure many have done before and can be done for anyone not just a child. ENJOY!


Dipped Bleach Shorts 

Materials
Old Jeans
Scissors
Bleach
Glass container

Step 1:
Lay those suckers out

Step 2:
Cut off the legs. Remember to add length so that you can fold them when you are done

 Step 3:
Fill your containter with bleach, enough to cover how far you want the bleach to go(remember it will bleed a little). DIP DIP DIP (hold for a count of about 30 sec)

Step 4: Lay them out to dry

Step 5: Wash. Fold. Put 'em on.

My little princess modeling them for you 


Sunday, January 15, 2012

New Year New LaVoz

Hey guys, I know I started off the new year with just a simple DIY but I wanted to introduce you guys to my new layout. Unfortunatly I have not had enough time in my schedule to go out and do all the street style shots that I originally had planned for the page, but like they say when one door shuts another one opens. Well let the door fling. Are you ready for it? I'm so excited! I'll be doing small features on people all over New York with awesome style as well as my DIYs ofcourse and more to come in the near future!


This weeks how-to:
Leather Faux Bow-Tie
Materials
10"x4.5" piece of fabric
4"x1" Strip of fabric
Glue
Safety pin/Ribbon
Step 1:
Gather your materials and apply glue along a short edge of your fabric.
Step 2:
Fold over the opposite edge and press down so the glue will stick. Let dry.
Step3:
Start folding accordian style down the center. Make sure the top and bottom edges are facing you. Wrap your fabric strip around the folded center

Step 4:
To secure it add a dot of glue and press down.

Step 5:
Take your safety pin and slide it in between your fabric strip and bow. If you'd rather use a ribbon instead of the safety pin and tie it around your neck feel free. They both get the job done, you would just slide it in here


I was inspired by Levensky to make a studded leather bow tie. You dont need to put studs but it you do I suggest putting the studs on before you assemble the tie. Good luck, hope you enjoyed! Dont forget to send pictures of your DIY projects to Crissy@lavoznyc.com


Sunday, January 1, 2012

Bobby Necklace DIY

Happy New Year Everyone! I decided there is no better way to start off the new year than with a simple DIY for my lovely friend Alycia. I did two different versions. The First is with a camping rope that I found in the hardware store in my neighborhood, the second is with a leather jewelry cord from a local craft shop. Enjoy!

Materials
Rope/cord
Bobby pins
Scissors

Step 1
Take one end of your string and tie a loose knot


Step 2
Slide all your bobby pins through the other end

Step 3
Pull one end through the loose knot and make another knot around the other side.

Step 4
Tighten both knots and pull at the two sides until the knots come together . Separate the knots and adjust to ur desired length

Step 5
Look good
Rope Version
Leather Cord Version
Note: To get a different look you can also spray paint the pins. I'll post some pictures of spray painted ones on a later date.