Showing posts with label fashion. Show all posts

Wednesday, January 7, 2015

Keys To Surviving: Maternity Style 101

If your anything like me you don't want to sacrifice your style just because your pregnant, but you also don't want to spend the amount of money that they charge for decent looking maternity clothes. Since this is my 3rd go around Im no stranger to the whole maternity wardrobe battle.
I seriously don't want to walk around looking like I'm about to do yoga all day or like Im a big fat present with a bow over my belly, now I'm just venting...

1st Trimester

This one is fairly easy since you don't grow too much during the first trimester. Of course we as women notice when any of our jean begin to feel a little tighter and it seems like a huge deal but for the most part we can still wear our normal clothes. Towards the end though to give your pants a little bit more life take a rubber band or hair tie, loop it around your button hole and secure it on your button.  It should look like this 
Photo via Pinterest

2nd Trimester

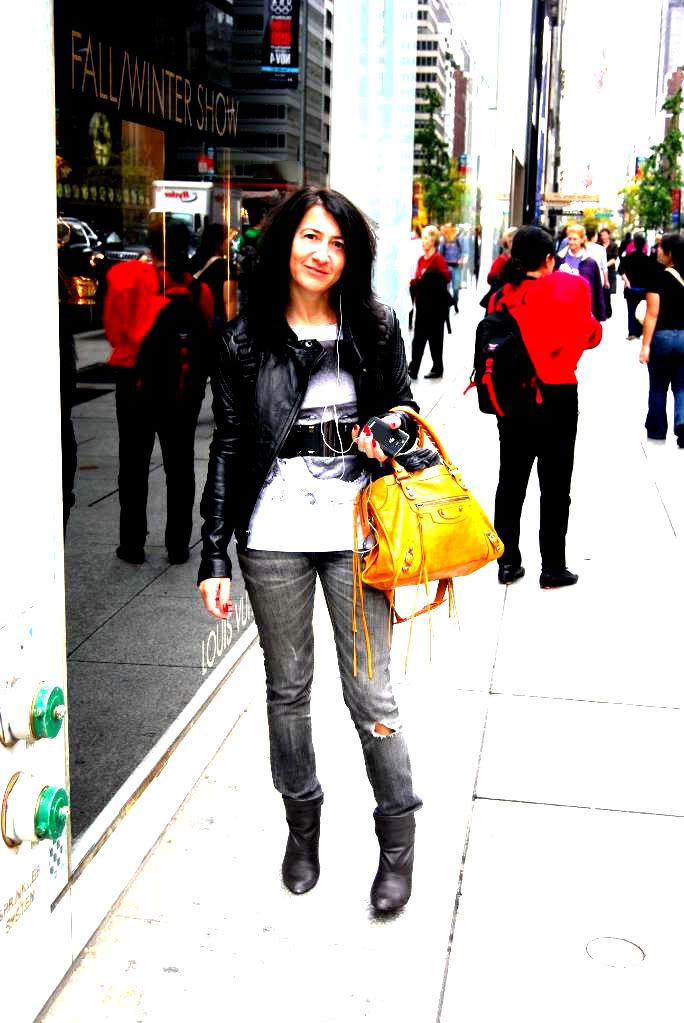
One of the things I highly enjoyed doing once my body started to battle my wardrobe was invading my boyfriends closet. His Shirts became my dresses, lucky for me he has a decent sense of style and his wardrobe only consists of black and white. It's also good for covering up if you're showing just a little and don't want anyone to know, or if your stuck in that "i just look fat not pregnant" stage.
In my boyfriends Shirt

3rd Trimester

Now this can go for mid-late 2nd trimester too and it is really the only Maternity clothing item i suggest buying. Maternity pants. You're definitely going to need them. I still hate spending much money on them because honestly you'll only be wearing them a few months. I usually go on ebay and look for something thats cheap and suits my style. For everything else just stick to stretchy and breathable materials

Maternity jeans $11 on ebay

Hope this helps! I'd love to hear feed back and see photos!

Tuesday, April 8, 2014

DIY TeePee

Hey guys!
So I was looking to revamp my sons room, I really wanted to get him a tee pee but they cost a pretty penny that I don't have. So I did a little research and this is what I came up with, I'll link some of the original tutorials that I looked at through the tutorial. Its the lazy DIYer tutorial

DIY Teepee

What you'll need:
4 Sticks 2x1x6ft
Elastic
Tshirt (cut in strips)
Canvas/Fabric
Staple Gun or Needle and thread

Step 1- Gather your sticks
This is pretty self explanatory, I got mine pre-cut from Lowes about $1 each stick
Step 2- Secure with elastic
This part of the tutorial I saw over on A CUP OF JO and the type of elastic she used it better suited for this project but I couldn't find it and didn't have the patience to keep looking. I used some sort of flat bun jee elastic, tied it, then cut the ends.
Step 3- Separate to desired size
Push the bottom of the sticks out to create the structure of the tee pee. I made mine to fit in the corner of my sons room.
Step 4- Cover and secure
Take a white tshirt and cut off the bottom seem, then cut 2 strips and wrap them under and over the wood pieces and elastic, make sure to cover the elastic.
Step 5- Cover with Fabric
This will probably be the hardest part depending on how you choose to secure the fabric
Drape the fabric over the wood(btw I used a drop cloth), Start securing it from the back first
Staple Gun: which was my method since I am lazy and impatient, start stapling from the top and make you way down for a total of about 4 staple per piece of wood
Thread: With a needle and thread secure the wood on top middle and bottom of the wood pieces

Note: When I was done with this I had some extra fabric hanging from the bottom of the tee pee so I cut off the excess cut a triangle and stapled it to the top of the tee pee opening, this is optional but I liked the look of it better

Sunday, March 9, 2014

Faking the Sun

With this New York City weather trying to kill us me and my skin have been craving for some sun. The sun refused to cooperate so I decided to take a little trip to Duane Read and try to capture some sun myself. I researched dupes for Benefits Sun Beam and was hoping to find one when I went shopping but couldn't find one so I settled for this. Physicians formula Glow-Boosting pressed  shimmer bronzer, while it did give me a soft golden glow it wasn't as much as I was hoping for. The packaging is pretty cool and convenient for traveling and throwing in your purse. I think once I actually have a tan it'll look really good. If you're looking for something  subtle like in the photo you can click here to see the product.

Editors Note: Still looking for the sun

Sunday, March 3, 2013

DIY Leather Clutch

Recently while I was going through the March issue of Vogue magazine I noticed this cute leather Celine Clutch and I was inspired to make this simple DIY for you guys.

DIY Leather Clutch

Materials
Leather
Fabric
Cereal Box
Marker
Scissors
Glue 
Bobby Pins

Step 1
Trace cereal box twice


Step 2
Draw two tabs on the bottom rectangle about an inch. I didn't measure them I just eyeballed it. They dont need to be perfect they wont be showing. Now draw a flap on top ( I decided to eliminate it in my final clutch but if you want yours to serve as a flap then make sure its an inch or two wider than mine)

Step 3
Draw tabs on your top flap


Step 4
Cut it out

Step 5
Cut out the front and back. Glue fabric to one side of cardboard. Glue cardboard to bottom part of the clutch


Step 6
Glue flaps for top and bottom, hold it down with bobby pins until the glue settles


Step 7
Glue Side tabs by placing the glue at the edge of the inside lining. Fold in the tabs and fold bottom of clutch over. Make sure everything is aligned and lay something heavy on it for about 20 minutes or so. I set my Vogue on it. With all those ads it was heavy enough.

Step 8
Slide the other piece of cardboard inside. Now you can tuck in your top flap or not its up to you.


Enjoy Errrrbody!

Tuesday, January 8, 2013

Lavoz For Qu3st

I recently made a vest for Qu3sts new music video Revolutionary Affiliates.


Go check out the full video!!!! Oh yea and Im in it too!! Woop woop!

Qu3st- Revolutionary Affiliates

Hope you enjoy!

Tutu Dress Made for a Princess

My daughter who Ive mentioned in previous posts turned two last week! I ended up making her this cute little tutu dress, it was super easy only took about 45 minutes. I took a look at a couple of youtube posts before I got started. I've posted the links to the ones I found most helpful at the bottom. Best part?!?! It Cost me less than 10 dollars!


Tutorial 1 by Tuttie Cutie Tutus

Tutorial 2 Part 1 Part 2 Part 3 Part 4 Part 5

Wednesday, October 21, 2009

5th Avenue


How can I begin to describe 5th Avenue. If you want to be in the fashion industry I guess it's one of the places that you want to be. The streets are lined with designer stores and gorgeous window displays. The look of the New Yorkers I could instantly spot among masses of tourists was minimal chic with designer accesories. Monogram Louis and Guccis definitely run 5th avenue. It's the place to be if your pockets are nicely lined for spending. Too bad mine aren't.

5'ths Snazziest


This weeks How-To: "Stud your life"
Materials
Flat back Studs
Multi Purpose adhesive
Pair of Tweezers
Something to stud


Step1: Make sure the surface of whatever you're studding is clean
Step2: Grab a little piece of paper and squeeze a little adhesive onto the paper

Step3: Using the back of your tweezers apply a small amount of adhesive to the back of a stud.
Step4: Place the stud on your item using the tweezers and repeat until you get lazy or think you're done.
Step 5: Viola, an easy update to an old boring pair of shoes. Sit back and think about how your life just became a little bit more awesome.


Notes: For the Adhesive I used Beacon's Gem-Tac permanent adheisive. Both the glue and studs were found at M & J trimming